DIY: Relocating the JL Rear Power Supply Outlet
July 25, 2023
Tags: DIY, Jeep
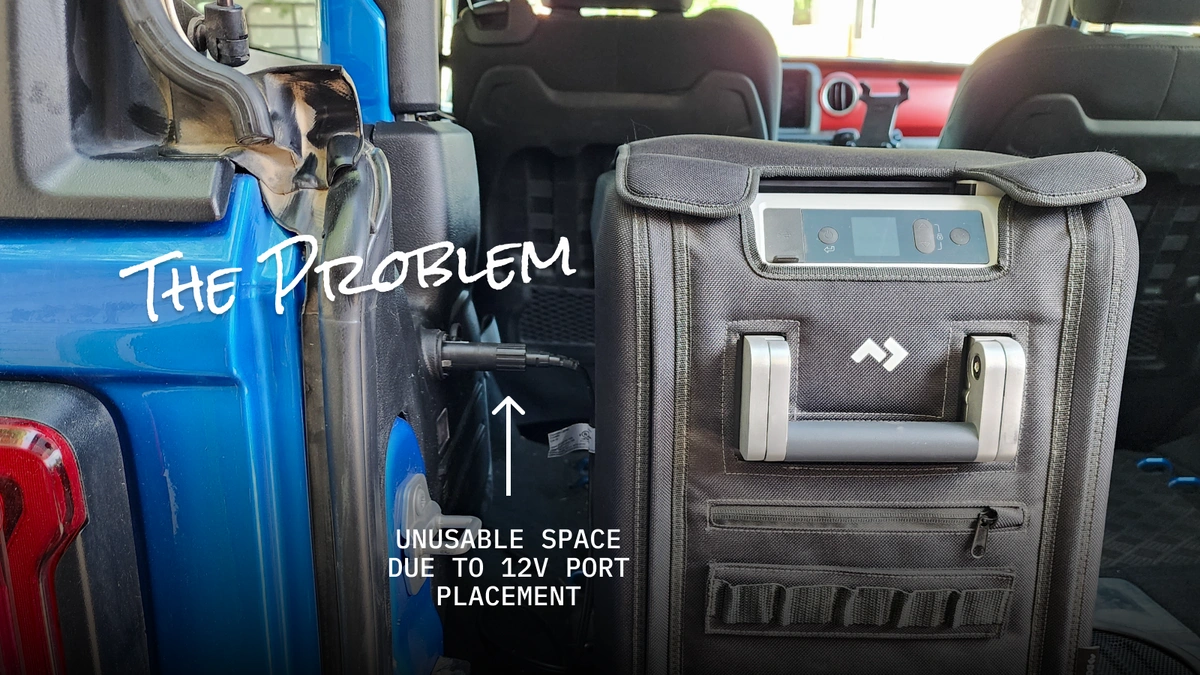
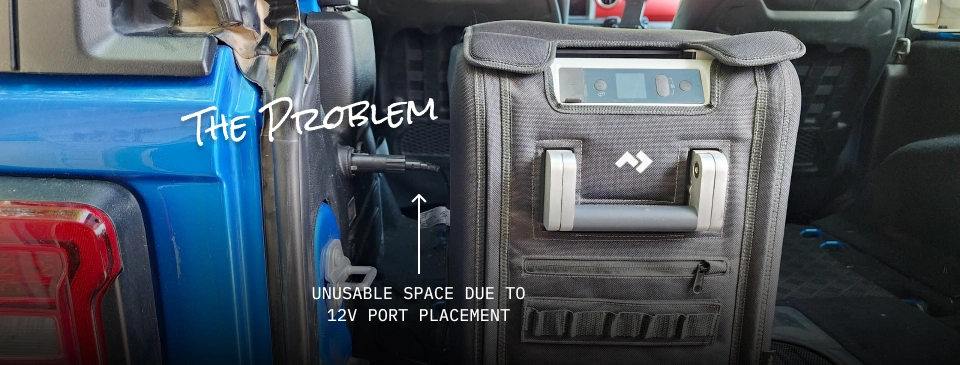
We all know that when it comes to packing a Jeep, every inch counts. Any available real estate should serve a purpose; sometimes, real estate must be created. One of my favorite yet frustrating things about the Jeep JL is the rear power supply port location. This supply port makes it very convenient to get power to items in the back of the vehicle without a string of wires coming from the front of the cab. You can easily power cell phones, tablets, camera gear, auxiliary lights, air compressors, and portable fridges/freezers. However, when using this power supply, you inherently need a few inches of room from the supply port to accommodate space for the power cord of whatever items you are supplying power to. In the case of our Dometic CFX3 35 fridge, the height of the supply port made it impossible to push any items flush against the driver's side tub. Any items stacked on this side of the Jeep while using the fridge had to be shorter than the supply port; otherwise, we lost several inches of usable space.
After many configuration attempts, the easiest solution for making these few inches usable was to relocate the power supply. I got to work after purchasing a new 12v power port from the local auto parts store.
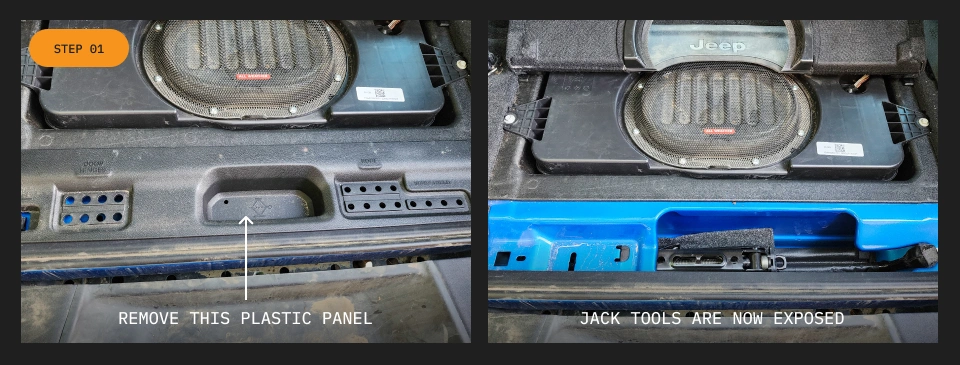
To relocate the power supply, you need to remove the plastic panel it sits in, and there are a few steps to doing this. First, remove the panel covering your jack.
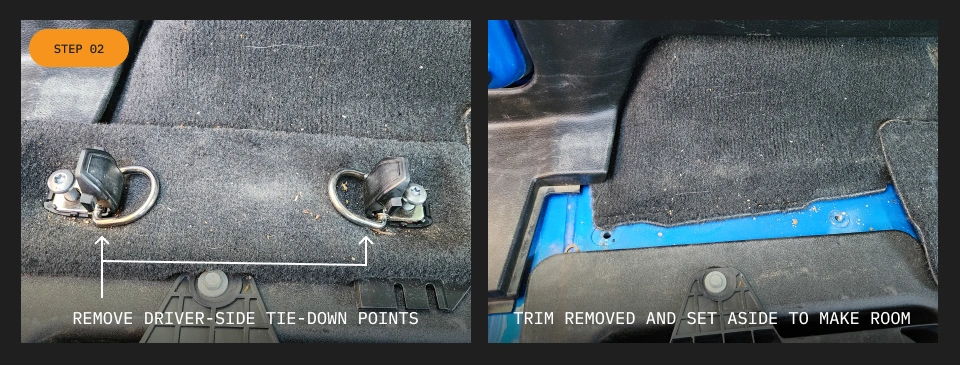
Next, removing the driver-side tie-down points is helpful using the torq bits provided in your factory Jeep tool kit.
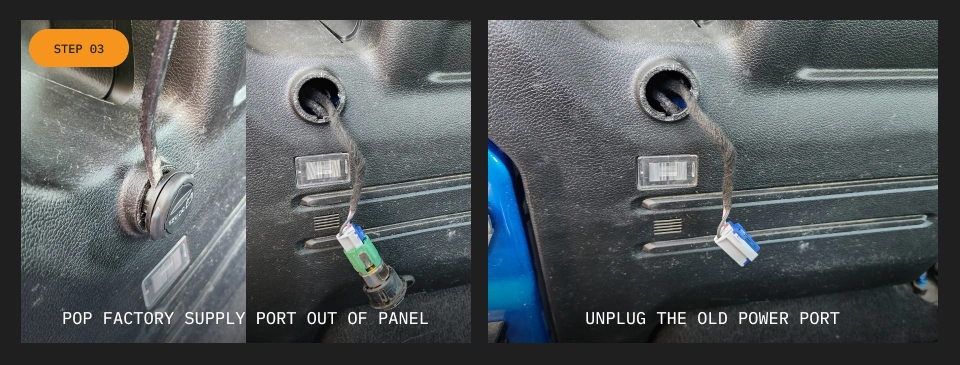
After making a little room, I used a small prybar to pop the factory supply port out of the panel molding, allowing me to access the wiring where I could unplug the old power port in preparation for removing the panel.
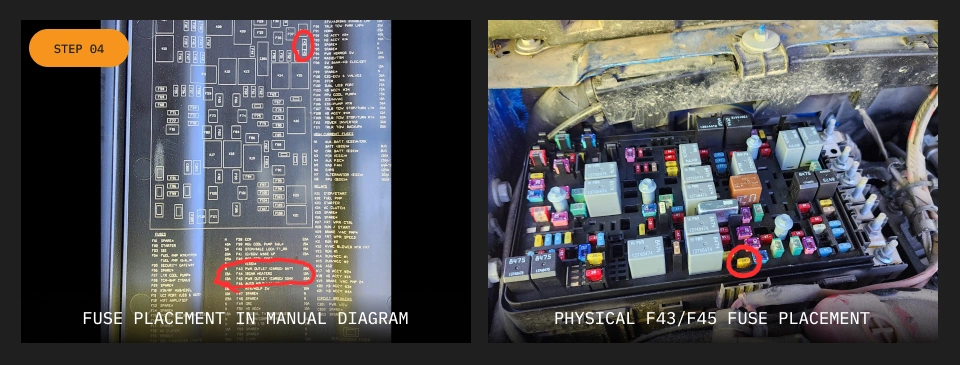
Since we know we will be doing electrical work, removing power to the supply port is a good idea. You can do this by disconnecting the battery or pulling the F43/F45 fuse under the hood.
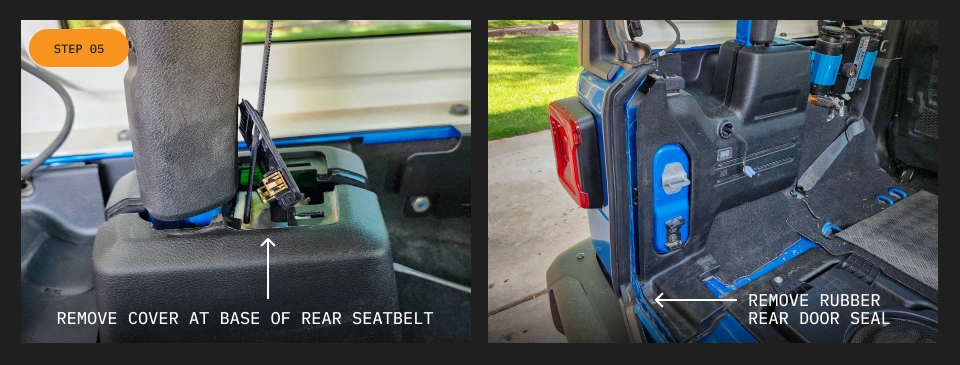
With these few things out of the way, it's time to remove the panel. You first need to remove a cover above the rear seatbelt at the rollbar, as it holds together two panels around the rollbar that you need to separate. After popping that panel, remove the rubber door seal to gain more access to the bottom of the panel for prying purposes.
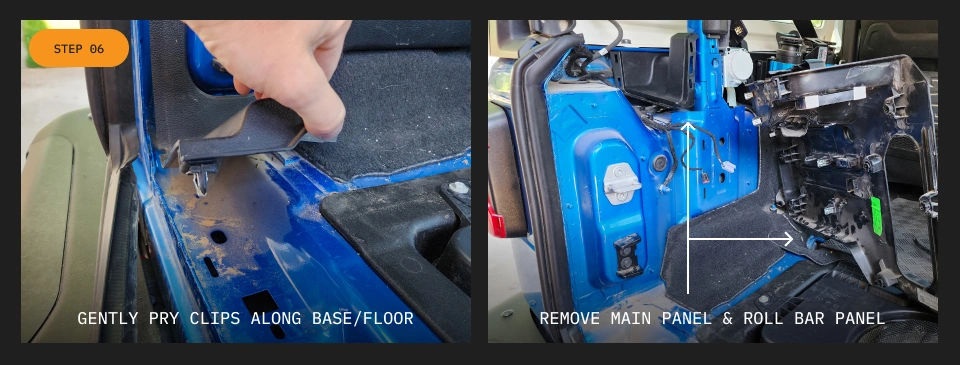
A panel removal tool is best for this job. However, a small prybar, a flathead screwdriver, and firm yet gentle pressure will remove the panel from the grips of the metal tub. Be gentle, and apply pressure directly at the clips, attempting to pop one at a time, all the way around the panel. Too much pressure, or uneven pressure, can result in broken clips. Once the panel is out of the way, disconnect the wiring from the rear cargo light and remove the final panel surrounding the rollbar.
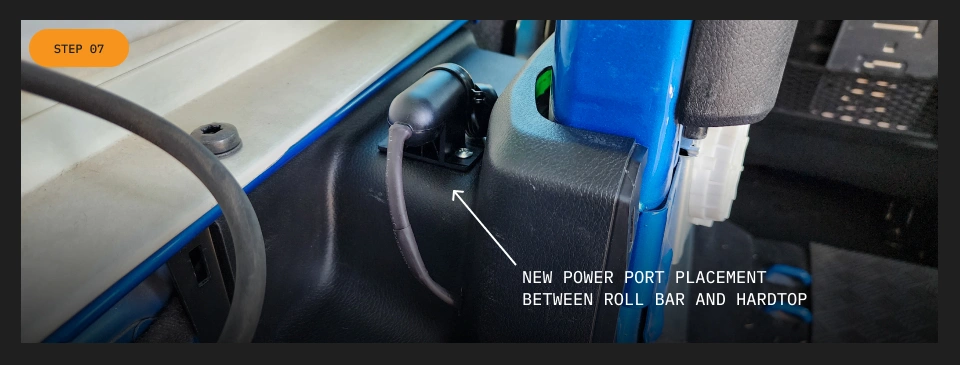
I found the best location for the new power port was between the rollbar and the hardtop on top of the molding. Pre-drill a couple of holes for the mounting screws and drill a small hole to feed the new wires through, and you will have a clean-looking new power supply port.
Splice the wires from the new power supply to the factory wiring, and weatherproof the connection. This can be done in a variety of ways, so choose a way that you are most familiar with. After reconnecting the wires, plug in your fuse and confirm that the new supply port works correctly. Once confirmed, you can reinstall everything in the same order you removed it. I opted to reuse the factor power supply cover to ensure a clean look without plugging an empty hole.

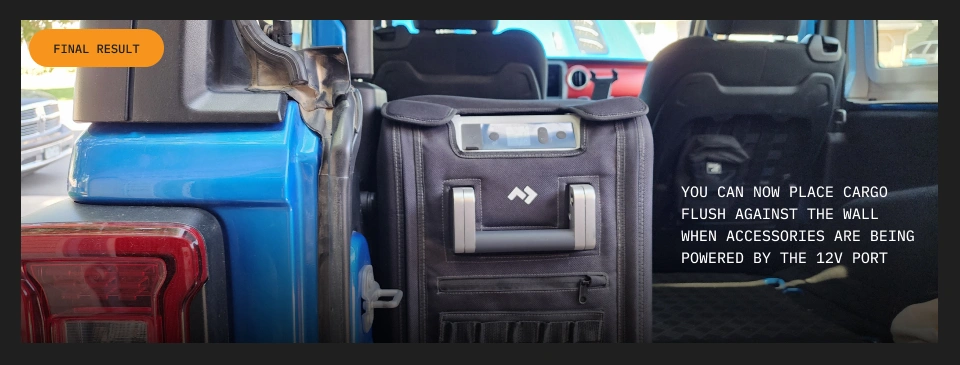
The new power port location allows the fridge to be pushed flush with the body and gains valuable storage space. It might have only been a few inches, but if we know anything as off-roaders, a few inches can make a big difference.

Ariana grew up driving the dirt roads of southeastern Colorado before living in Denver where she was introduced to the offroad and overland community while exploring the Colorado Front Range. Now residing in Utah, Ariana heads up Marketing and Design for Trails Offroad™. You can find her on the trail, always looking for the next amazing campsite in her 2004 Lexus GX470 with her two border collies.


Community
Partners